
Planning an Immersive Craft Workshop Weekend, Step by Step
Updated: 6 days ago
Last Updated: November 7, 2026
Quick Summary
A craft workshop weekend is a small group's two or three days of hands-on making, guided instruction, shared meals, and rest between sessions. Plan it in three layers: instruction, environment, and follow-through. Choose a beginner-friendly project such as needle felting, and pick a venue that handles both the making and the overnight stay.
Pick a theme in advance and keep the participant list small enough for individual attention.
Plan roughly 6 square feet of clear table per person for fiber work.
Schedule at least one unstructured block each day so participants do not fatigue.
Set a per-person budget from line items and add a contingency of roughly 10 percent.
Send a feedback survey within a few days of the weekend to keep participants engaged.
Table of Contents
What an Immersive Craft Workshop Weekend Actually Includes
A craft workshop weekend brings a small group together for two or three days of hands-on making, guided instruction, shared meals, and time to rest between sessions. The format works best when every part of the weekend supports the making, from the first demonstration to the last cleanup.

A typical weekend includes a workshop theme chosen in advance, a teaching artist or instructor, a participant list kept small enough that everyone gets attention, and a take-home project.
Think of the weekend in three layers:
Instruction: demonstrations, guided practice, and time for independent making
Environment: a workspace, lodging, and meals that keep people focused and comfortable
Follow-through: feedback, a finished project, and a way for participants to keep practicing afterward
Skipping any layer usually shows up later.
Craft Workshop Ideas for Adults That Suit Mixed Skill Levels
The best craft workshop ideas for adults are the ones that let a complete beginner and an experienced maker work side by side.
Other formats that work well for mixed groups include spinning, weaving on small looms, and surface-decoration techniques.
When planning, consider:
A project with clear stages, so beginners can finish the basics and advanced makers can keep going
Two or three levels of difficulty in the same session, announced at the start
Pairing an experienced participant with a beginner for part of the day, when the group is open to it
For the project itself, keep the first step simple. Browse the Irish Gnome Needle Felting Kit for an all-in-one beginner project.
Choosing a Venue for Making and Staying Overnight
Choosing a venue for a craft workshop weekend means deciding whether the space needs to do two jobs: host the making and house the group overnight. Many venues handle one well and the other poorly. A studio with excellent tables and good light may have no lodging, while a lodge with comfortable rooms may have no room large enough to lay out materials for twelve people.
Use this checklist to compare venues on the things that actually decide whether the weekend runs smoothly.
Workspace and surfaces
Table area per participant: plan on roughly 6 square feet of clear table per person for fiber work, and more for projects that need layout space such as weaving or surface design.
Table height and seating: confirm chairs are adjustable or matched to the table, since a weekend of hunching over a low table wears people down.
Floor covering: fiber work sheds, and a venue that minds a little wool on the floor is easier to work with than one that does not.
Sink access: a utility sink near the workspace saves trips and keeps clean-up contained.
Ventilation, light, and power
Daylight and task lighting: ask whether the room has windows and whether you can bring clamp lights for evening sessions.
Ventilation: important for any activity that produces dust, fumes, or fine fibers; confirm windows open or that the room has mechanical ventilation.
Outlets: count them and ask where they are, especially if you plan to use heat tools, irons, or equipment that draws power.
Storage and security
A lockable room or cabinet for tools and materials overnight.
Labeled bins or shelves so works in progress can stay out between sessions instead of being packed and unpacked each day.
A place to store finished pieces so they dry, set, or simply stay safe until departure.
Lodging capacity
Confirm the number of beds and the room configuration, and whether participants share rooms or get singles.
Ask about bathroom ratios; a group of twelve sharing one bathroom changes the morning schedule.
Check whether the lodging is in the same building as the workspace or a short walk away, and what that walk is like after dark.
Meals and dietary needs
Ask whether the venue provides meals or whether you arrange catering, and who handles dietary restrictions.
Confirm kitchen access if you plan to prepare any food yourselves.
Access and transport
Ask about step-free entry, elevator access, and accessible restrooms before you book, not after.
Confirm parking and drop-off, and how far the venue is from the nearest airport or train station for out-of-town participants.
Ask whether the venue can help with local transport for people who do not drive.
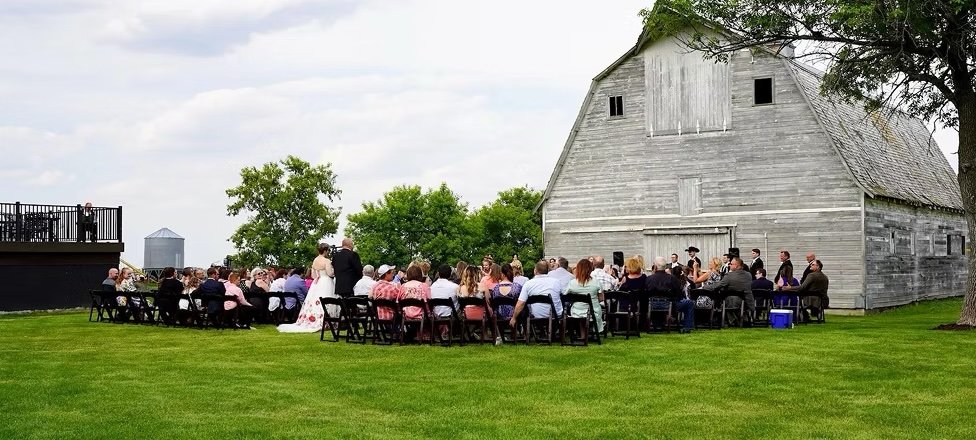
Historic buildings can be especially appealing for this kind of weekend, but check the layout before you book. Stairs, narrow doorways, and limited accessible restrooms can matter a great deal for a mixed group.
Watch out: a venue that looks ideal in photos can fail on the details that matter most, table height, outlet placement, and bathroom count, so ask for a floor plan or a video walkthrough before signing anything. Once the floor plan confirms the practical details, fold the same checks into the rest of the event planning, with RI Party Store as a useful next stop.
Craft Workshop Weekend Schedule: A Realistic Hour-by-Hour Plan
A realistic craft workshop weekend schedule leaves room for slow starts, clean-up, and rest. The goal is to give people enough time to learn a technique without running them into fatigue.
Friday
2:00 p.m.: Arrival, check-in, and a short welcome
3:00 p.m.: Introduction to materials and tools, plus a safety briefing
3:45 p.m.: First guided project session, about 90 minutes
5:30 p.m.: Break and free time
6:30 p.m.: Shared dinner
Saturday
8:30 a.m.: Breakfast
9:30 a.m.: Second guided session, focused on a new technique
11:30 a.m.: Independent making time with instructor check-ins
12:30 p.m.: Lunch
1:30 p.m.: Finish and refine the main project
3:30 p.m.: Group show-and-share
Build in at least one unstructured block each day. Participants who are tired by mid-afternoon make less progress and enjoy the weekend less, even when the content is strong.
Craft Workshop Supplies Checklist and Safety Planning
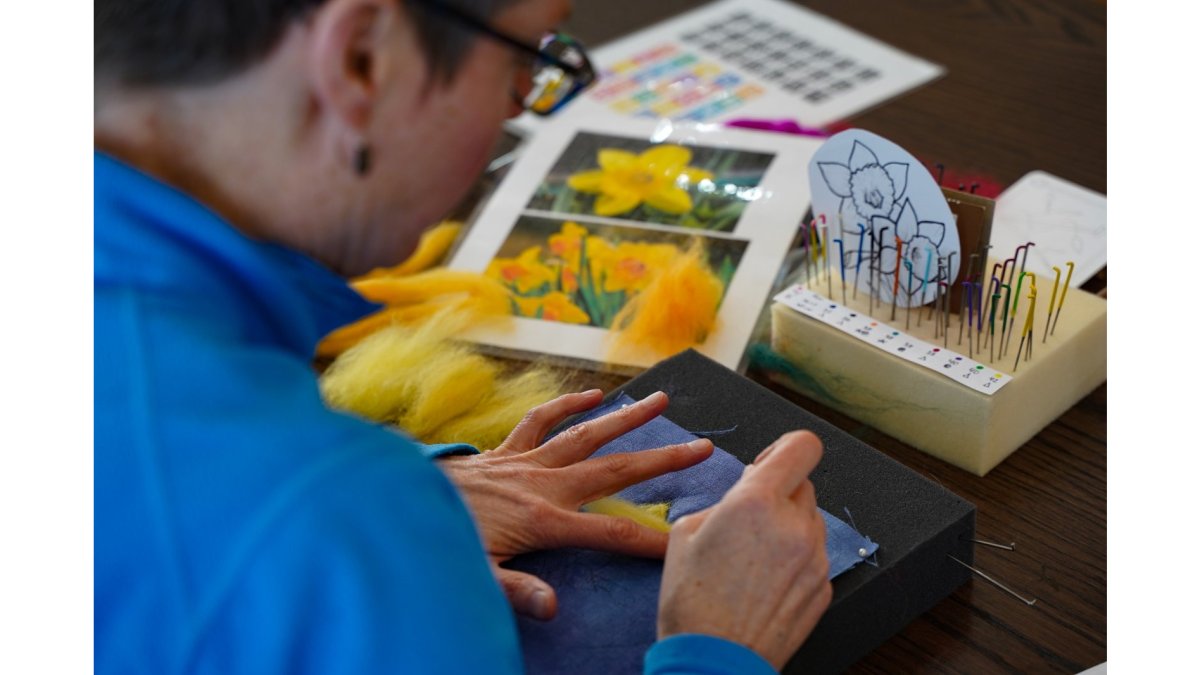
Good planning starts with a supplies list that matches your schedule and your skill mix. You can browse felted supplies in one place to source materials for the workshop.

Core supplies checklist
Wool roving in the colors and quantities your project needs
Felting needles in several gauges, with replacements on hand
Foam felting pads or a sturdy work surface
Clear workspace for each participant, with good lighting
Labeled bins for works in progress
First-aid kit, including bandages for needle pricks
Safety planning Felting needles are sharp and can cause puncture wounds, so give a clear briefing on how to hold the needle, where to keep hands, and what to do if someone is injured. For more depth on professional-quality results, read our article on needle felting supplies.
For any workshop that uses other tools, such as knives or heat, set explicit rules, confirm that an adult supervises each activity, and plan for who will respond if a problem occurs.
How to Host a Successful Craft Workshop Weekend
Hosting a successful craft workshop weekend comes down to preparation, pacing, and attention to the group. Start by setting a clear goal for the weekend, such as finishing a specific project or learning a set of techniques.
During the weekend:
Demonstrate once, then let people practice. A short demonstration followed by hands-on time works better than a long lecture.
Circulate. Check in with each participant at least once per session, especially beginners who may be hesitant to ask for help.
Protect the unstructured time. People often produce their best work when they have space to experiment.
Close with sharing. A show-and-share at the end gives everyone a moment of recognition and gives you material for feedback.
Expect a few things to go sideways. A participant may struggle with the first technique, a supply may run short, or the schedule may run long.
Budgeting, Accessibility and Follow-Up for Your Next Retreat
Planning a craft workshop weekend involves several costs, and they vary with group size, dates, materials, and lodging.
Per-person budget structure
Build the budget in five lines, then add a contingency:
Instruction, the teaching artist's fee or day rate, divided by the number of participants. If the instructor travels, include travel and lodging for them as a separate line.
Materials, the cost of consumables per participant (fiber, roving, needles, pads, thread, dyes) plus a small overage for mistakes and replacements. Divide the total material order by the expected headcount to get a per-person figure.
Lodging, the room rate per night multiplied by the number of nights, divided by the number of people sharing each room.
Meals, breakfast, lunch, dinner, and snacks per person per day, based on whether the venue caters or you arrange food yourselves.
Venue and extras, the workspace rental or facility fee, plus any equipment rental, transport, or insurance.
Then add a contingency line of roughly 10 percent of the total. A common pattern is for supply costs and food to run over the first estimate, and the contingency is what keeps a small overrun from turning into a loss.
Setting the participant price
Accessibility planning
Accessibility deserves the same care as the budget.
Follow-up after the weekend
After the weekend, follow up while the experience is fresh.
To learn more about our workshops and lodging, visit Nome Schoolhouse's classes and retreats or browse our supplies to plan your next making session.
The main costs to plan for, and how each one is typically handled, are summarised below.
Cost line | What it covers | How to calculate |
Instruction | Teaching artist fee or day rate | Fee divided by number of participants |
Materials | Consumables such as fiber, needles and pads | Total order divided by expected headcount, plus overage |
Lodging | Room rate per night | Rate times nights, divided by people sharing each room |
Meals | Breakfast, lunch, dinner and snacks | Per person per day, based on catering or self-arranged food |
Venue and extras | Workspace fee, equipment, transport, insurance | Added as fixed or per-head line items |
Contingency | Buffer for overruns | Roughly 10 percent of the total |
Frequently Asked Questions
How long should a craft workshop session last?
Most hands-on craft sessions work best at 90 minutes to three hours, depending on the technique. Needle felting and simple weaving can fit into shorter blocks, while spinning or multi-step projects need longer stretches so participants are not rushed. Build in breaks every 60 to 90 minutes, because people working with their hands tend to lose focus and get tired wrists. For a weekend format, alternate longer skill-building sessions with lighter, shorter activities so the schedule feels relaxed rather than packed.
What supplies should you prepare for a hands-on craft workshop?
Prepare everything the project needs before participants arrive, including tools, base materials, and a clear plan for backups. For a needle felting workshop, that means felting needles in several gauges, foam work mats, wool roving in the colors you plan to use, and extra needles because they bend or break. Label each participant's kit, count supplies in advance, and set up a shared station with scissors, cloth, and cleanup items. A written checklist reduces last-minute gaps and makes it easy to restock for the next session.
What are some creative ideas for adult craft workshops?
Strong adult workshop themes include needle felting small animals, hand spinning yarn from raw fleece, simple floor-loom weaving, and natural dye projects. Choose one core technique and a take-home project that finishes in the time available. Beginner-friendly projects keep the group engaged, while an optional extension task gives experienced makers something more challenging. Themes tied to the location, such as local fiber or historical crafts, add a sense of place that participants remember after the weekend.
How can you make a craft workshop welcoming for beginners?
Start with a short demonstration of each step, then let participants practice with a simple sample before starting their final piece. Keep group sizes small enough that the instructor can check each person's work. Explain the vocabulary you use, avoid assuming prior knowledge, and tell people in advance that they do not need experience. Pairing a confident maker with a first-timer and offering clear, low-pressure feedback helps people feel capable instead of behind.
Comments