
Needle Felting Supplies for Professional Results That Last
Last Updated: November 5, 2026
Quick Summary
Professional needle felting supplies differ from hobby kits in needle quality, wool consistency, and tool durability. Buy needles in small batches by gauge and barb profile, choose clean carded wool, and use a thick wool cushion instead of thin foam. Replace needles once they push fiber instead of catching it.
Lower gauge numbers mean thicker needles for coarse shaping; higher numbers suit fine detail and finishing.
Roving is the safest fiber choice for beginners and detail work, while batts suit large sculptural forms.
A pad must be thick enough that a full needle stroke never reaches the bottom.
Compare cost per usable needle, not sticker price, since cheap packs often fail sooner.
Store needles in a case so barbs do not dull against each other.
Table of Contents
What Separates Professional Needle Felting Supplies From Hobby Kits
Professional needle felting supplies differ from hobby kits in three measurable ways: needle quality, wool consistency, and tool durability. Hobby kits bundle low-grade needles with loose fiber and thin foam, which is fine for a first project but fights you on the tenth. Professional results start with supplies that survive repeated use. The same attention to fiber consistency applies beyond felting, where choosing quality wool batting can shape how well a quilt holds together over time.
The difference shows up fast. A cheap barbed needle can bend early in a project, loose roving may fail to lock, and thin foam can let needles strike the table beneath.
Below, we break down what to buy, what to skip, and how to match each supply to the stage of your project.
Needle Felting Tools That Hold Up to Daily Studio Work
Durability is the whole game for tools you use daily. Three things decide whether a felting needle survives: steel temper, barb cut, and shaft thickness. A well-made needle keeps its barbs sharp through hours of work, while a soft one can dull and start pushing fiber instead of catching it.

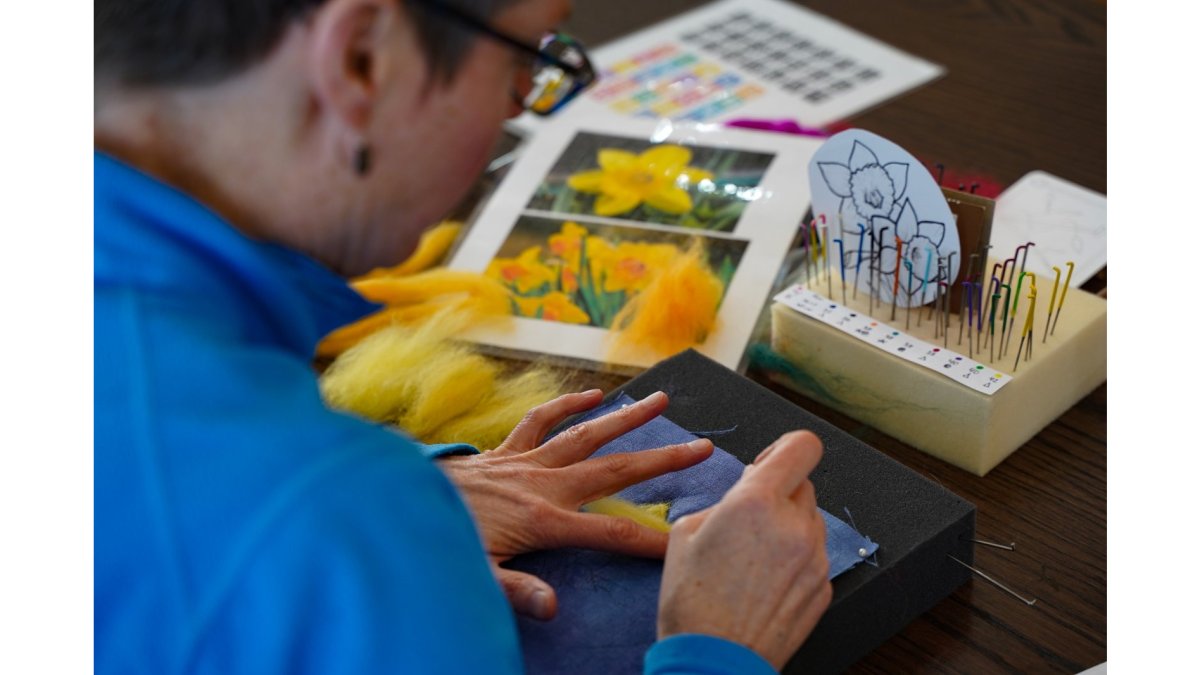
Needle felting at a table
A common mistake is buying needles by price alone.
Needle Gauges and When Each One Earns Its Place
Gauge determines what a needle does, not how good it is. Lower numbers mean thicker needles for coarse shaping; higher numbers mean finer needles for surface finishing and detail.
36 gauge: coarse shaping, core forms, and fast fiber density build-up
38 gauge: the all-round workhorse for most wool roving
40 gauge: fine detail, surface smoothing, and small features
Star and twist profiles: catch more fibers per stroke for faster felting
Crown profiles: leave a cleaner surface with fewer visible holes
Keep a small assortment of each on the bench rather than one "do-everything" needle. Our full range of felting needles covers these sizes, and you can also browse other sizes and types of felting needles including 36 standard triangle, 38 cross star, 38 twist, and 40 crown in tubes of six.
Handles, Multi-Needle Tools, and Ergonomic Grips
Handles change how long you can work before your hand tires. A wooden handle gives grip and control for detail work; a multi-needle tool covers more surface in less time for large forms. Felting speed comes from tool choice as much as technique.
For single-needle control, a simple holder that slips over the needle and locks with an O-ring keeps your fingers clear of the barbs. Our single needle felting tool holder works exactly this way, and it is the tool we reach for on faces and small animals.
The Best Wool for Needle Felting: Matching Fiber to Finish
The best wool for needle felting is clean, carded wool with consistent staple length. Wool fiber that is matted, greasy, or short-stapled will not lock together no matter how long you poke it. Fiber density in the finished piece starts with fiber preparation.
Roving, Batts, and Carded Sliver Compared
These three fiber forms behave differently in your hands.
Fiber Form | Best For | Felting Behavior | Watch For |
Roving | Detail work, small pieces | Smooth, easy to separate | Over-twisted, dense strips |
Batts | Large forms, backgrounds | Fast coverage, soft loft | Uneven thickness |
Carded sliver | Blending colors, core wool | Loose, airy, quick to felt | Short staple, lots of VM |
Roving is the safest choice for beginners and detail work. Batts suit large sculptural forms where you need volume quickly. Carded sliver is best for core wool and color blending, but check for vegetable matter before you commit.
Mats, Foam Pads, and Work Surfaces That Protect Needles and Hands
A work surface does two jobs: it stops needles from striking the table, and it holds your piece steady while you felt. Thin foam fails at both. It compresses under pressure, so needles hit hard surfaces and bend.
Choose a pad thick enough that a full needle stroke never reaches the bottom. Wool cushions last far longer than foam and grip the fiber better, which matters when you are shaping a piece from every angle. Our eco-friendly wool felting cushion is made for exactly this, and it holds up to daily studio use.
Finger guards are not optional for beginners. A leather guard on the non-dominant hand prevents the most common injury in this craft: needling through your own finger.
Kits vs. Individual Supplies: What Each Buyer Actually Gets
A starter kit makes sense once. After that, buy individual supplies. Kits bundle a mat, a few needles, and a small wool selection at a lower entry point, but the needles are usually the weakest part and the wool colors rarely match your next project.
Individual buying costs more up front but gives you control over gauge, wool quality, and quantity. Professional felters almost always buy needles and wool separately, replacing only what wears out.
If you want to skip the guesswork entirely, our needle felting workshops put real tools in your hands before you buy, and our signature kits give you a curated starting point with fiber from our own mill.
Side-by-Side Comparison of Leading Needle Felting Supplies
To compare supplies for professional results, consider criteria that affect finish quality: barb consistency, breakage rate, surface smoothness, and cost per usable needle.
The Four Criteria That Separate Professional-Grade Supplies
Barb consistency. A professional needle catches fiber on every stroke. Run a single needle across a test batt of coarse wool for two minutes and count the strokes that pull fiber versus the strokes that slide.
Breakage rate. Track how many needles snap per project. A needle that breaks at the shaft rather than the tip usually means the steel is too soft or the pad is too thin.
Surface smoothness. Finish quality is visible. After firming a test piece, check for visible holes, loose fibers, and uneven density under raking light. A crown or star profile should leave a cleaner surface than a standard triangle at the same gauge.
Cost per usable needle. Divide the pack price by the number of needles that survive their first project. A cheaper pack with a high failure rate often costs more per usable needle than a smaller pack of consistent needles. This is the number professionals should compare, not the sticker price.
How the Main Supply Options Compare on Those Criteria
Supplier | Starting Price | Best For | Standout Strength | Limitation |
Nome Schoolhouse | $15.00 | Curated kits and hands-on learning | On-site mill, workshops, curated kits | Limited to our own selection |
LIVING FELT | $17.49 | Specialist supply shopping | Broad selection, free tutorials | Most individual prices not listed |
Blick | $4.50 | Beginners and hobbyists | Visible price range, basics covered | Aimed at hobby level |
Heidifeathers | Not listed | Kit comparison and guidance | Clear guidance on core supplies | No current prices or specs shown |
A Repeatable Test You Can Run at Home
Set up a controlled comparison before you buy in bulk. Use the same wool, the same pad, and the same stroke count for each needle you test. Record three numbers: strokes to firm a 2-inch cube of core wool, needles broken during the test, and a visual smoothness score after a finishing pass with a 40 crown. Repeat with at least three needles per gauge so a single defective needle does not skew the result. This turns a subjective 'this feels better' into a decision you can defend.
For a deeper walkthrough of matching gauge to project stage, see our guide to felting needles and the other sizes and types of felting needles we stock.
How to Display Needle Felted Art on a Wall Without Flattening It
Mount felted art so the fiber keeps its shape and air. Pressure is the enemy: glass pressed against wool flattens the surface and traps dust in the fibers. Use a shadow box frame with depth, or mount the piece on a backing board with hidden pins.
Keep finished pieces out of direct sun, which fades dyed wool over time. For a deeper walkthrough, read our guide on how to display needle felted art at home.
Long-Term Cost, Replacement Planning, and Defect Troubleshooting
Plan for needles as a consumable, not a one-time purchase. Even good needles dull with use, and a dull needle can cause messy-looking felting. Replace needles when they start pushing fiber instead of catching it.
Troubleshooting common defects:
Loose, fuzzy surface: switch to a finer gauge for finishing
Visible holes: use a crown or star profile and work at a shallower angle
Uneven density: build in thin layers rather than one thick mass
Broken needles: your pad is too thin or your angle is too steep
Budget for replacement needles and a fresh pad each season, and store needles in a case so the barbs do not dull against each other. Color-coded needles make gauge changes faster mid-project.
Frequently Asked Questions
What supplies do I need for professional-looking needle felting?
Start with a small assortment of felting needles in different gauges, a foam mat or wool pad, and clean wool roving. Add a wooden handle or multi-needle tool for larger areas and finger guards for safety. A storage case keeps needles organized and protected. Professional results come from matching needle gauge to the stage of the work and keeping fiber density even, not from buying the largest kit available.
Which wool is best for detailed needle felting?
Fine merino and other soft, short-staple wools felt quickly and hold crisp detail, which makes them the best wool for needle felting faces, small animals, and surface design. Coarse wools work better for core shapes and armatures because they build volume fast. Many felters layer a coarse core under a fine top layer so the finished piece stays firm while the surface looks smooth.
Is needle felting an expensive hobby?
It can be affordable to start. A basic setup of needles, a mat, and a few wool colors covers most beginner projects, and individual supplies let you add tools as your work grows. Needles break and wear down, so plan for replacements. Buying a complete kit once often costs less than assembling every item separately, but only if the kit includes the needle sizes and wool you will actually use.
How do I choose the right needle felting tool for fine details?
Use a single fine-gauge needle in a lightweight wooden handle for detail work. Fine gauges leave smaller holes and give more control around edges and facial features. Save multi-needle tools and heavier gauges for building core shapes and covering large surfaces. Keeping two or three handles loaded with different needles lets you switch tasks without re-threading, which speeds up the whole process.
How can I make a needle-felted piece look polished and ready to display?
Finish by trimming loose fibers with small sharp scissors, then spot-felt any thin areas with a fine needle. For wall display, mount the piece on a rigid backing or inside a shadow box so the surface is not compressed. Avoid framing felt under glass, since trapped moisture and pressure can flatten the texture. A shallow shadow box keeps the work visible and protected while preserving its dimension.
Building a studio that produces professional results takes the right needles, wool, and surfaces, plus practice with people who know the craft. Nome Schoolhouse offers curated felting kits, a working wool mill, and hands-on workshops in our restored 1916 schoolhouse, so you can learn on real tools before you invest. Get started with Nome Schoolhouse and build a supply kit that holds up to daily work.
Comments